Sunday, August 10, 2014

Goo Gone - a product review

The bumper sticker on my car was old and very faded. I applied one coating of the Goo Gone and waited a few minutes, per the instructions. After the initial wait, I was able to peel the vinyl like top coating.

goo gone


A very sticky under layer remained. I applied a second coat of Goo Gone and let it sit for a couple of minutes. It loosened it up quite a bit and I got a good amount of it off.

I applied a third coating of Goo Gone and waited another minute or so, and easily wiped the remaining sticky stuff away. Voila, all the sticky spots and signs of the old bumper sticker were gone.

I had a second smaller bumper sticker that I decided to remove. It hadn't been on the car quite as long, only around a year or two. That one only took two coatings of the Goo Gone for it to be wiped away. I again had to peel the vinyl type layer off first, and then did the second layer. That was all that one needed.

If you have a sticky residue on a hard surface to remove, I would recommend Goo Gone. The previous text link goes to Amazon.

The company recommends not to use it on soft surfaces, faux steel, unpainted dry wall, unfinished wood, and unsealed stone. The label goes into more detail.

Cheryl Paton

Thursday, April 10, 2014

I am enjoying our screen away storm door

storm door

When it was spring, it had finally warmed up enough that my family was saying it was too warm inside the house. It was too soon to turn on the air conditioner; the temps outside were cooling off in the evening.

When it was the start of autumn, the opposite occurred. The house was too cool in the evening, but comfort returned as long as it was sunny during the day.

All of that changed when we had a screen away storm door installed. Within in few moments, we could make an environmentally friendly adjustment. We could open or close the screen part of the screen away storm door. Ah, welcome warmth of warm air, or welcome cool of cool air, whatever the case may be. It improved the comfort of our home naturally.

The old storm door required unscrewing the screen or window, and installing the opposite at the change of the seasons. Although it helped overall, it wasn't conducive to taking advantage of the change of the daily temperature change during the day or evening.

With our new storm door, that became a thing of the past. No mass changing out the window or screens, just flip the support switch and lower the screen portion, or raise the screen portion to the top position, and flip the support switch in the other direction. Ah, such ease.

We had our first screen away storm door installed in the kitchen. We loved it so much, that we had a second one installed in our living room the following year.

What a welcome relief. I got to open the kitchen and the living room screens on the storm door. Ah yes, the cross breeze blew through and it was pleasantly cooling the rooms off.

The screen away storm door is one of the best purchases that I've made. Larson is the company that made ours.

Update 1: They came in different styles. You can get one with a privacy portion on the bottom. You can view that one on Amazon: Larson Screen Away Storm Door with Privacy Bottom.

We had gotten the full view option. Our cats prefer the full view option.

However, the full view screen away door apparently is no longer an option. They do however show a full window option that you can change out with a full screen. They also offer a pet door option on their website.

Update 2: We purchased a second Larson Screen Away Storm Door for the front of our house. The adjustment mechanisim to lower and raise the screen had changed. The lever on the first door we purchased, Lever 1, worked great; it was easy to operate. The lever on the second door was hard to get back into the lock position to hold the window in the closed (all the way up) position. If you purchase an adjustable screen door from Larson, I recommend asking about the mechanism that raises and lowers the screen and holds the window in place. My preference is the style shown as Lever 1.


Cheryl Paton

Monday, December 30, 2013

Hangman Dry Erase Board from Zazzle Review

My daughter and I like playing hangman, and started playing it on a small dry erase board. We liked the convenience and sturdiness of it, so I decided to make one on Zazzle.com.

I made a hangman design and added the alphabet, and repeated it to be able to play three games before having to erase.

The game is played a little different on the alphabet version, as each letter is crossed off from the alphabet, whether it is used or not, so the players can see the remaining letters left. That part may require a little getting used to, but overall works pretty well.

The hangman figure and the alphabet remain after erasing, which is pretty cool, for playing the game.

The dry erase board itself, from Zazzle, is made of an acrylic which has some thickness to it, and is see through. The print and the hangman design are printed on the card stock that it is attached to. This means, that if you're looking at the design straight on, everything looks good and lined up.

However, if you look at the board from an angle, the lines over the letters that have been crossed off, will appear a bit off set. So the board may need to be repositioned to see clearly which letters remain. Other than that, the game works well.

You can click on the link to see more details, and/or to order if you are interested.


It's also fun to play it on Post-It-Notes paper.


Cheryl Paton
CherylsArt on Zazzle.com.

Sunday, January 29, 2012

Product Review - Pinhole Glasses for Improving Vision

pinhole glasses
Here you will find how I used pinhole glasses for improving my vision.

On one of my visits to the optometrist, many years ago, the doctor had said that next visit, he thought I should get bifocals. I thought, no way.

I started searching for natural ways to improve my vision. I read books, purchased kits, did eye exercises, and I was on my journey back to better vision naturally.

I have gradually been improving my vision over the years and have used various techniques. So far, the easiest one that I have used is the wearing of pinhole glasses. It's easy, because I just have to put them on. And they provided results. I also went without glasses as much as possible. At first, it was just in restaurants, where I could see a fuzzy person sitting across the table from me; and at home where could more easily see and know what was around me.

That is no longer an issue. I can read store names across the mall, easily and clearly see the people sitting across from me in restaurants, and also at other nearby tables.

I usually wear the pinhole glasses when watching TV. They especially come in handy in not only make the characters more distinct, they immediately improve my ability to read any text, which is especially great for watching shows like, Wheel of Fortune.

The pinhole glasses can take some getting use to. When wearing them, I usually had to adjust my head position and or eye position to see a more clearer picture, especially at first. Overall, I found the adjusting my head well worth it.

You can find pinhole glasses online on Amazon: Pinhole glasses.

Another technique that I usually do is moving my eyes in a wide circular motion, both clockwise and then counter clockwise. It's especially easy to do this while wearing the pinhole glasses, as I just follow around the rim of the frame with my eyes, a few times in each direction, thereby getting in some extra eye exercises while wearing the glasses.

I see much more clearly now than when I first started. Before starting natural vision exercises, one eye was rated as 20/600 and the other 20/650. On last exam, I could see better than 20/200 on a combined measurement without any glasses at all.

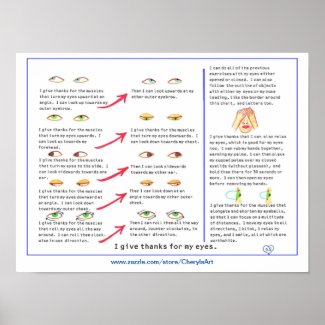
In addition to wearing pinhole glasses, I also incorporate eye exercises throughout my day. I drew some diagrams of the eye exercises that I do, like the circling of the eyes in each direction. A relaxing technique for your eyes, is to rub your palms together, and place them over your eyes. You can check these techniques and others out on posters at my CherylsArt store on Zazzle.


Before you go, think of the lyrics - I can see clearly now, and decide to notice the things that you do see clearly.

Cheryl Paton

Wednesday, May 4, 2011

Armarkat Cat Tower Tree Condo

I had made a Cat Climbing Toy, which I had positioned in front of our dining room window. Since then, the cat that we had passed on, and we got two more rather active cats. I wanted to be able to see them enjoy watching outdoors more. The window in our living room sits higher, and looks out on bushes that borders our neighbors yard. The birds love hanging out there. I knew our new cats would be more intrigued with this view.

After shopping around for awhile, I decided on the Armarkat Cat Tower. It had a pretty substantial base, and if I left off the top tower piece, it would line up perfectly with our living room window. One cat could lay on the top perch and the other could easily lay or sit on the condo part.


cat tree

When either one is feeling frisky, they also enjoy playing with the yarn balls. The cat tower actually came with five levels, but I only used four; the base and three more levels. It fits better by the window for us, with just the four levels.

The cats love it and couldn't wait for us to get it built. I think they knew it was for them. They were especially excited while I laid out the pieces on the floor.

This is the model that we purchased. We left off the upper post and top bed, as we didn't need or want the extra height.


Amarkat Cat Tree, 57" Cat Tree Ivory, on Amazon


There are other Armarkat Cat Tree models to choose from on Amazon. They come in varying height options, colors, and styles.

Update: The yarn balls have since come off, but the tower still stands sturdy and our cats still use it. I've since purchased little pet pads (kind of like a cover for a pet bed) and laid one on each of the top levels. Then I can easily launder those as needed to keep the unit cleaner and more fur free.

Cheryl Paton

Friday, March 4, 2011

Color in Aprons can be a fun birthday party activity for kids

As a kid, I loved to paint; pictures, walls, you name it, I loved to paint it. Most kids love to paint, especially when they're painting something that is either theirs and/or that they can give as a gift.

For a while, I was the hostess for birthday parties at a local arts and craft store. One of the most popular activities was painting something. Each kid was intrigued with designing their own creation, and everyone looked forward to taking their masterpiece home, whether it was a picture frame, a wooden box, a tee shirt, their painting on a canvas, etc.

Another thing about kids, is that they also love to wear their creations, if it's clothing of some sort. So I invite you to consider Outline Drawings on Aprons as the canvas for their next creativity session.

Why aprons? The material that aprons are made of isn't stretchy like tshirts, making them easy to control as the coloring process proceeds.

There are many aprons that can be ordered with outlines already printed on them. Kids can paint them in, add to the design, and then get to wear them! They can wear their aprons when they help out in the kitchen, do a messy project, and/or for more painting. It's a win win.

I ordered aprons from Zazzle, with pre-printed outlines on them, to test them out. They are made of sturdy cotton, and lay nice when painting on them. A piece of solid cardboard placed under them is best to keep the paint from bleeding through to the underneath surface. The cardboard can also be taped to the back of the apron, to help keep it in place, while painting.

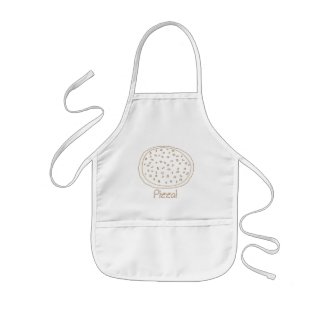
Here's one of the samples of designs that you can find at my CherylsArt store on Zazzle:


You can use acrylic fabric paint, acrylic paint with fabric medium already mixed in, and or acrylic paint markers. The acrylic paints do a great job for painting on fabric; and there are lots of colors to choose from. You may need to heat set the painting once it is dry, so check the labels on the medium that you choose for the recommended method.

Do test the paint markers on a scrap fabric piece or at least some scrap cardboard to make sure that the paint flow is working. If it isn't coming out yet, press the paint tip down on the scrap material a few times, and then try drawing with it on the scrap material first before painting on the apron.

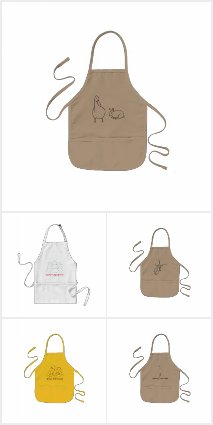
Check out more outline aprons in my CherylsArt store on Zazzle:


Happy Creating.

Cheryl Paton

Wednesday, March 2, 2011

Affirmation Stickers are Helpful for Kids and Adults

When my daughter was young, she loved receiving stickers for a job well done, for a lesson learned, for encouragement, and more. I thought that she had perhaps outgrown it, but maybe not.

I had read a comment on an earlier affirmation article of mine, that a lab technician and dietitian uses them in their work place, and that they work. I love that they're being used in work places too.

I guess we really don't outgrow liking signs of appreciation. Sometimes I even give myself some appreciation, by giving myself a compliment in the mirror. I still give my daughter appreciation, but perhaps I'll give her some in the form of some stickers too.

How about you?

These Bright Idea and Great Job stickers are a great way to reward the recipients. They are printed by Zazzle, a print on demand company. The stickers are peel and stick, and come in a choice of two sizes. They have a glossy finish and stick well.


Happy Rewarding.

Cheryl Paton